Get ready to breathe in the fresh air and spend quality time in the great outdoors because you’re about to plan your first camping trip!
After camping for over ten years, I’ve put together this guide of camping tips for beginners based on everything I’ve learned over the years. From choosing a campsite to pitching a tent to packing the right clothing and gear, here you have the complete guide to camping for beginners!
Understanding Camping Basics
If you’re a beginner camper, planning your first camping trip can sound like a daunting task. What I’ve found is that the daunting part is actually camping for the first time—not necessarily planning the trip. Regardless, before you plan your first camping trip it’s important to understand the following camping basics.
Front Country vs Backcountry
There are two main types of camping, front and backcountry; they refer to the proximity of road access.
- Front country camping: Front country camping refers to all camping where you can drive up to your campsite and have your car parked next to you. It refers to car camping, tent camping, and RV camping where you can set up your tent next to your vehicle or sleep in your vehicle. I’d recommend front country camping for beginners.
- Backcountry camping: Backcountry refers to camping in the wilderness where there is no road access. You have to hike, ski, bike, etc. to get to where you want to camp. A backcountry trip is a completely different beast, so I’m going to mostly address information about front country camping in this guide.
Different Types of Campgrounds
Next, it’s important to understand the different types of campgrounds you can stay at. Depending on what you choose affects what amenities, services, and access you have at sites.
Established Park Campgrounds
Many national and state parks have campgrounds open to the public to book. Camping in national parks is a great option for your first time camping. There are plenty of people around, easy access to trails, and typically amenities are good, but research ahead of time before booking.
Most park campgrounds have flushing toilets, clean water, some have hot showers, and they have picnic tables and fire pits at each campsite.
Generally camping sites in parks cost between $10-$40 depending on the place. Some have hookups for RVs and in larger national parks there is usually a park store nearby.
Established Private Campgrounds
Similar to park campgrounds, established private campgrounds usually have amenities like hot showers, RV hookups, flushing toilets, and clean water. However, these private campgrounds are not located in parks, they are outside parks on privately purchased land.
KOA’s are a popular option for first-time campers and many have extra amenities including pools, playgrounds, and mini-golf courses. Other privately owned campgrounds are located in popular areas outside of national and state parks. They are usually a bit more expensive from $20-$70 a night depending on what services are available.
Semi-Established Campgrounds
Semi-established campgrounds are popular in national forests and on other public lands. They are cheaper than established campgrounds but usually have limited amenities. Most are limited to a communal pit toilet and sites probably have a table and fire pit.
These campgrounds are often first come first served where visitors must find an open campsite as they drive in, put cash in an envelope, and fill out their information to reserve a site for the night.
Dispersed/Wild/Free Camping
Dispersed camping involves finding a place to sleep on public land for free. This is common off of forest service roads in national forests or on Bureau of Land Management Land (BLM land) common in deserts.
These free camping areas are common outside of national and state parks in remote areas. While they are a great way to camp for free, there are no services available. You are responsible for bringing everything and packing everything out.
Dispersed camping is not ideal for a beginner camping trip but can be a great option down the line.
How to Plan Your First Trip
Planning your first camping trip can sound like a lot of work, but I promise you it’s easier than you think. With proper preparation and the right gear on hand, you won’t have to worry about a thing.
1. Pick a Location for Your First Camping Trip
Picking a location is one of the first steps when planning your first camping trip. If you’re a camping beginner, it’s best to choose an area you are familiar with, within a few hours from your home, maybe somewhere you’ve visited before.
Even if you’re familiar with an area always do some prep work ahead of time. Here are things I always do before picking my camping location.
Check the Weather Forecast
Depending on the time of the year, the weather varies drastically in some environments. It’s important to research the average weather each month because if you’re visiting a popular destination, you’ll likely have to book months in advance.
Book your Campsite Early
Campsites in popular destinations book up early. Many states or national park campgrounds open their campsite reservations 5 to 6 months ahead of time and spots fill almost immediately. In popular destinations book your campsite early to guarantee a spot.
Check what Campground Amenities are Available
Some campgrounds have communal hot showers, flushing toilets, a general store, clean drinking water, and sites with a picnic table and fire pit. Other campgrounds have minimal services.
While booking your campsite, check to see what services are available. It is listed on all campground websites. While you might feel comfortable sacrificing a shower for a couple of nights, you might not feel comfortable digging a cathole for human waste if there are no toilets.
Pick a Nice Site
Nowadays, many campground websites have maps and photos of their campgrounds. If available, I always try to book large campsites with scenic views away from the bathroom.
Camping near a bathhouse often brings more noise and light however, some people prefer those sites if they frequently use the bathroom at night.
I also try to pick a larger campsite. If more friends end up coming on my trip I want to have enough room for multiple vehicles and the ability to stake tents at a comfortable distance.
2. Choose Camping Gear that Will Last
After you decide where you’re going you must start to gather camping gear. The basic camping gear includes your sleeping gear, a kitchen setup with camp stove, and some additional items for comfort.
I’ll get into the details of what to bring later in this post but depending on where you’re camping and the weather in that location plays a large role in what to bring. Also, you must choose if you plan to be tent camping or car camping.
When searching for gear I regularly shop at REI because it is well known for its camping and outdoor recreation gear. Employees there have plenty of knowledge and information to help you pick out what is best for your camping trip.
Local gear shops in your towns are great too! However, just know good quality camping gear gets pricey so it can also help to borrow gear.
3. Do a Gear Check Before Heading Out
Before I leave for a camping trip I always make sure all my gear works and is in good condition. I set up my tent to make sure it works right and I light up my stove and make sure I have an extra lighter.
I charge all my electronics and battery pack before heading out and I bring extra batteries for items like my headlamp.
4. Arrive Early
On your first camping trip, you’ll want to get to your campsite early, with daylight, to check into your campground reservation.
As it gets late many check-in booths close and site passes are posted on the main entrance window. This is convenient, however, not ideal when it’s your first time camping.
Check-in, become familiar with the surroundings, check out the amenities, and make sure you understand the way the roads run. Many campgrounds have one-way loops and a maximum speed limit of 5 or 10 mph. At night campgrounds get very dark with minimal lighting so it’s much easier to navigate during the day first.
How to Create a Camping Meal Plan
Meal planning ahead of time will make your camping experience go much smoother. In many places, you will have minimal access to stores so it’s best to plan your camping food ahead of time and plan to bring everything with you.
1. Plan Simple Meals
Camp cooking can actually taste just as good as at home but it requires planning. Choose meals you are very comfortable with at home that can be cooked in one pot. Pasta with veggies, mac and cheese, burgers, and foil-wrapped sweet potatoes are all great options for a basic meal plan.
And don’t forget the spices! Salt and pepper are necessities for any meal and I always carry a bunch of additional spices with me. It’s an easy way to boost the quality of a meal.
An alternative is a dehydrated meal. Many outdoor stores sell dehydrated meals that are simple to make. Boil hot water, pour it into the pack, let it sit for 20 minutes, then eat. While these meals are very easy to make, they generally don’t have fresh food so I reserve these meals for backcountry trips.
2. Get a Good Camping Stove
First thing first, you need a reliable, durable stove. There are a few fuel options for stoves; some of the most popular are fuel canisters with propane/butane, white gas, wood-burning, and charcoal.
Propane/Isobutane Canister Stoves
I love my 2 burner Coleman stove. I’ve had it for a few years, use it regularly and it’s still in great condition. It requires a propane canister to fuel it which is commonly available at camping and outdoors stores as well as general stores and gas stations in outdoor areas.
Propane is one of the most popular options because it is affordable, easy to use, and generally permitted when fire restrictions are in place.
It’s also great for smaller camp stoves like a Jetboil which is great when you just want to boil a hot water meal like ramen or make coffee. I also like the MSR Pocket Rocket as an option for a small stove. Both the Jetboil and Pocket rocket use a propane/butane fuel combination.
Open Fire
Campfires are a popular heat source for cooking when camping. This is a great way to cook your food if you get your fire going and have some hot coals to cook food on or a way to roast things over the fire.
While campfires are always fun, it’s not great to rely on a fire for cooking. Many states have fire bans throughout the summer and fall. Other places limit where you can collect wood from especially if wet. Also, building a fire takes more effort, therefore, other stoves are great options.
If you do build a fire it’s important to only use local wood. Bringing firewood from other areas can transport invasive species of seeds and insects. Therefore, buy wood at the campsite or a nearby store.
Charcoal Camping Stoves
Some people prefer charcoal camping stoves. These are more effective than open fires and generally distribute heat over a larger surface which is great for meals for large groups or to get a grilled taste. However, when fire restrictions are in place, charcoal fires are sometimes banned depending on the area.
3. Don’t Forget About Coffee!
If you enjoy coffee at home you’ll definitely want coffee while you’re camping.
Drip coffee is the simplest way to make coffee while out camping. Just add the coffee grinds and pour-over. There are some convenient drip coffee devices to help with this.
For a little more luxury, check out the AeroPress Go Travel Coffee Press to brew some delicious coffee. Or check out the OXO Outdoor Campgrounds French Press.
4. What to Pack for your Kitchen
A full setup camping kitchen requires remembering a lot of things. If you plan to camp often it helps to keep all your gear together after each trip. Luckily most campgrounds provide a picnic table so you’ll need to bring these items for your kitchen.
- Camp stove and fuel source
- Lighter (a windproof one is a great idea)
- 1 or 2 cooking pans
- 1 pot
- Large mixing bowl
- Bowls, plates, forks, knives, and spoons for everyone camping
- Mugs for hot drinks
- Spatula or mixing spoon
- Cutting knife and cutting board
- Sponge
- Biodegradable soap
- Dishtowels
- Paper towels
- Aluminum foil
- Trash bags
- Cooler with ice
- Tupperware for leftovers
Tips for Pitching a Tent
Your tent is your home when out camping Choosing the right spot, and knowing how to set it up is important. Hers are some tent camping tips for beginners.
Set Up Your Tent at Home First
Always set up a new tent at home before heading out. There are many tent designs from a plethora of tent companies and some are more confusing than others. I’ve been camping for more than half my life and sometimes I come across a tent that takes me 20 minutes to set up.
If it’s windy, cold, or pouring rain you want to know how to efficiently set up your tent. Make sure you understand where every pole goes and the structure of the tent before heading out.
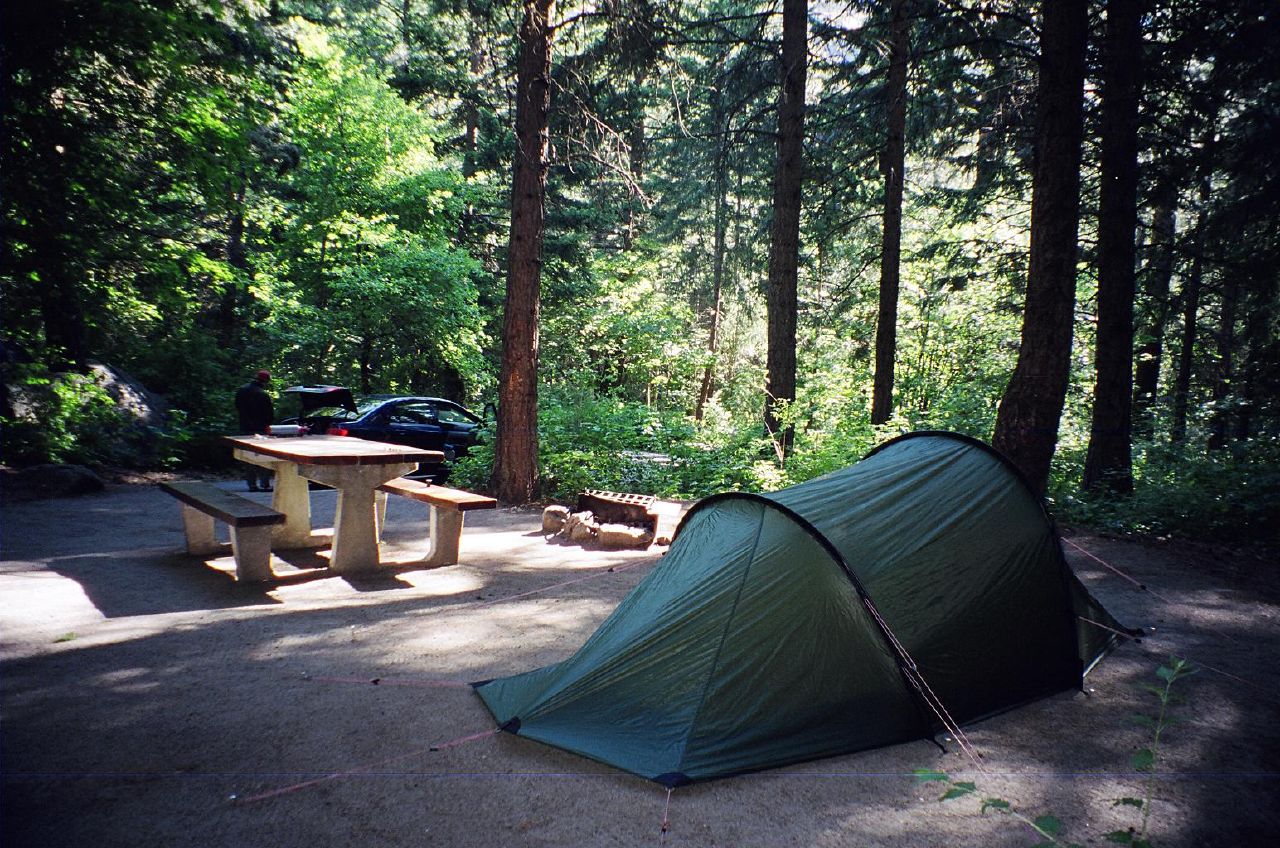
Choose a Flat Durable Surface
A flat durable surface is the best spot to set up a tent. Campgrounds almost always have established campsites. They are often cleared from pinecones and sticks and are comfortable spots to set up a tent.
If I have to choose my own spot, I try to choose an area where I’ll make the least impact. And flat, slabby rock areas or flat, dirt areas without vegetation are the best options.
Use a Tent Footprint
While optional and sometimes sold separately from a tent, a tent footprint is important to increase the lifespan of your tent. The extra layer prevents holes in the bottom of your tent and if you are camping in a wet area it will keep the inside of your tent floor dryer.
Tent Stakes or Guylines
When anchoring your tent down there are two main ways of doing so. Tent stakes are hammered into the ground with a mallet or rock while guylines are strings attached to the rainfly or sides of the tent on one side, and the other end of the string attaches to large rocks to hold the tent in place.
Tent stakes are the most common way to anchor a tent. They are great when camping in dirt or gravel. However, if you’re camping on the open rock where it’s impossible to hammer a stake into the ground, guylines are a great alternative. They’re also good in the sand when it’s windy if the stakes don’t stay in place.
Set Up Your Tent Away From the Cooking Area or Bear Box
No matter where you camp, some wildlife will wander through your kitchen when you finish cooking. Whether it’s insects, rodents, or bears, it’s best to give space between where the food is cooked and where you sleep.
I try to set my kitchen up on one side of the campsite and keep tents across the way on the other side of the campsite. Ideally, the rule of thumb is 100 feet between tents and the kitchen. This isn’t usually possible at campgrounds so give yourself as much space as possible.
At the end of the night put any trash in locking trash bins or store it in a bear box if available. If in bear country put all your food in the bear box and don’t leave anything in your car.
What to Wear Camping
Purchasing the right camping clothing is another important step for a successful camping trip. Investing in good camping clothes will better prepare you for your next camping trip too. Here are some necessities and some of my personal favorites.
Hiking Shoes
Comfortable, durable hiking shoes are important when out camping. Trail running shoes and hiking boots are both great options.
Trail runners are similar to sneakers or running shoes but have better tread for traction. They are much lighter than hiking boots. There are plenty of trail running shoe options but it always helps to try things on in a store before purchasing.
Hiking boots are also a crowd favorite. They come up higher providing more ankle support and many are waterproof which is great if you’re camping in a wet region. The new Danner Free Spirit’s are a great option for some trendy, retro-style hiking shoes. Forsake is another great brand.
For those hot summer days, you might want to invest in a pair of hiking sandals as well. If you plan on doing a lot of hiking, here’s what to wear hiking.
Clothing Layers
Day temperatures vary drastically from night temperatures in many locations; therefore, it’s important to pack layers of clothing so you’re comfortable.
Depending on the region I’m in, I pack 4 main layers with me; a baselayer, 2 mid-layers, and a water and windproof “shell” outer layer.
Base Layer
A base layer is the layer closest to your body. It’s important that this layer is made of wicking materials to move moisture away from your body while keeping your skin dry. Generally, base layers are made of synthetic materials including polyester and nylon or merino wool and silk.
Base layers come in different thicknesses or weights. The thicker or heavier, the warmer they are rated.
In warmer regions, a synthetic tank top should suffice, however, when it’s cooler a long sleeve is a great option and also provides UPF sun protection, even in hot regions. Mountain Hardware’s Crater Lake sun hoodies are my favorite.
Merino wool is a great option for cold weather. It’s one of the warmest materials for its comfort and weight. I love anything made by Smartwool. I’d recommend a thermal layer rated around 250. Men should check out these Smartwool tops and women should check out these.
Mid-Layer
Mid-layers are important for providing insulation which increases body heat. I usually bring two of these, a puffy layer and a fleece layer. These layers come in both synthetic and natural materials, both of which have advantages and disadvantages.
To start, a fleece works great as one of your mid-layer options. Made of polyester, fleece is great because if it gets damp it dries quickly and still keeps you warm. It’s also breathable which keeps you from overheating. However, because it’s breathable, the wind easily blows through it so you’ll still need a wind layer.
On top of the fleece, I usually wear a puffy insulated jacket. Puffy’s come in both down and synthetic materials. The thicker the puffy, the warmer it is, however, the heavier it becomes.
A down puffy jacket packs down smallest for the amount of warmth it provides. Its fill power ranges from 450 to 900, with 900 being the warmest and most compact. Unfortunately, if damp, down loses efficacy and takes a while to dry out. Check out the men’s and women’s Arc’teryx Cerium LT Hoodies.
Synthetic puffy jackets don’t compress as well as down and are heavier, however, they still insulate well when wet. Patagonia’s Nano Puffs are a great synthetic option.
Outer Shell Layer
Your outer layer is a shell. It needs to be waterproof and windproof. I’d recommend buying a jacket that is waterproof. While they’re more expensive than water-resistant jackets, a waterproof jacket will keep you much drier but they’re worth it.
Arc’teryx’s Zeta SL Jacket for both men and women is a great option. The REI XeroDry GTX is another option and a bit more affordable also made for both men and women.
Other Packing Essentials
It’s easy to forget a few daily essentials. This is a great additional camping for beginners’ packing list.
- Water – General rule is to carry at least 1 gallon of water per person per day. This is more important when you’ll be in areas without clean water to refill. Most campsites have clean drinking water. If you’re primitive camping, follow this rule. Bring a water bottle, and consider one that’s filtered, like the GRAYL Geopress.
- Food – In addition to whatever meal planning food you’ve packed it’s also important to bring extra food. If you end up delayed, or for some reason stranded, it’s always important to have additional food. High-calorie snacks like nuts, dried fruit, and bars are great options.
- Toilet Paper – Most campgrounds have a good supply of toilet paper in their bathrooms but sometimes they run out or you wake up in the middle of the night needing to pee you might want to just squat next to your tent rather than walk to the community toilet.
- Earplugs – Most campgrounds often have a lot of people and groups. They can get loud. If you want to sleep well, earplugs are very helpful.
- Pillow – A good night’s sleep is essential when camping for beginners. There are inflatable camping pillows but if I’m car camping or tent camping I always bring a comfortable pillow from home.
- First Aid Kit – It’s always important to have a first aid kit. MyMedic has great first aid kit options for varying group sizes and materials.
- Offline Maps – I always download offline maps. Many places are out of areas with cell coverage so offline maps make things a lot easier to know where you’re going if you run out of service.
- Lighter – It’s small and easy to forget; I always pack a few lighters because I can never seem to find them.
- Sunblock – It’s always important to protect your skin, even in the winter or in the snow.
- Knife/Multitool – In addition to a kitchen knife a pocket knife or multitool is a convenient item to have.
- Duffel Bag – pack all your clothes in a duffel bag to keep them organized in your car and easily move everything to your tent. I love my REI duffel bag, but here are some other duffel bags to choose from.
- Headlamp – Another easy-to-forget necessity. Check out the lightweight, rechargeable BioLite HeadLamp 330.
- Face Wipes: Whether you need to clean your face or give yourself a face wipe bath because there are no showers, face wipes always come in handy.